


Bedliner Overspray Removal Process
- The purpose of this document is to provide information on how to properly remove bedliner over spray particulate from vehicle A-surface.
- The approved tools and methods are current best practices for overspray removal with the least risk of damaging paint/finish.
- Bedliner overspray removal must be performed cautiously as to not damage the vehicle.
Refer to the overspray location for the approved tool info.
Refer to additional info pages for removal process details.
|
Overspray Location |
Approved Tool |
Tool Info |
Additional info |
|
|
Small Area |
Fiber Stick |
Jus N Tyme – P/N JNT530A |
Click text in blue for more information |
|
|
Large Area |
Wax Wheel |
3M Stripe Wheel ASIN B00063VT0G |
Click text in blue for more information |
|
|
Fiber Stick |
Jus N Tyme – P/N JNT530A |
Click text in blue for more information |
||
|
Duct Tape |
Generic |
Click text in blue for more information |
||
|
Fiber Stick |
Jus N Tyme – P/N JNT530A |
Click text in blue for more information |
||
|
Fiber Stick |
Jus N Tyme – P/N JNT530A |
Click text in blue for more information |
||
|
Rims |
Fiber Stick |
Jus N Tyme – P/N JNT530A |
Click text in blue for more information |
|
|
Razor Blade |
Generic |
Click text in blue for more information |
||
|
Duct Tape |
Generic |
Click text in blue for more information |
||
|
Additional materials to have on hand |
|
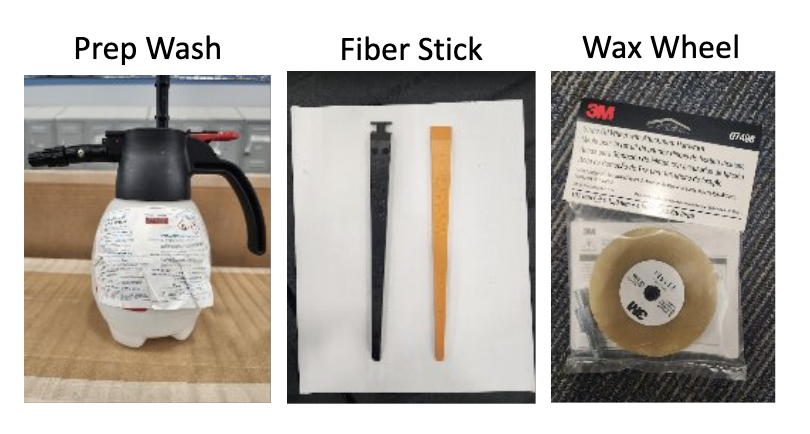
Prep wash – 70/30 Isopropyl Alchol and Water |
|
Clean rags / microfiber towels |
|
Power Drill with variable speed |
|
Masking Tape |
Painted Metal / Chrome/ Rims Overspray Removal Process
For smaller areas of overspray, all that is needed is a fiber stick and a clean rag. Soaking the overspray with prep wash will help soften the material and ease the removal process. If prep wash is used, dry the area with a clean rag prior to working on it.
CAUTION – Do not get prep wash on plastic trim, caulk lines, or head/tail lights.
Using moderate pressure, start removing the overspray until area is cleaned.
CAUTION: Applying too much pressure can damage the clear coat as well as the paint under the clear coat.

Painted Metal Overspray Removal Process
For larger areas of overspray, a power drill with wax wheel attachment can be used. Use masking tape to mask off the area you are will be working on. Wax wheel performs better if the area is dry.
Start slow working up to a medium speed, start using the wax wheel on the overspray area. When complete, use a clean rag with prep-wash and wipe the area to remove any excess wax or particulates.
CAUTION: If working next to plastic, make sure the plastic is masked off so the wax wheel will not damage the plastic. Do not use wax wheel on plastic trim, chrome, tail lights, glass and finished bedliner within bed.

Molded Plastic/Tire – Overspray Removal Process
Duct Tape Removal from molded plastic and tire overspray.

Taillights/Head Lights/Painted Plastic Overspray Removal Process
CAUTION – Do not get prep wash on plastic trim, caulk lines, or head/taillights.
Using moderate pressure, start removing the overspray with fiber stick until area is cleaned.
Glass Overspray Removal Process
With the razor blade on the window at a 45 degree angle, apply light pressure and scrap off overspray. If scrapping towards trim or a painted surface place a piece of cardboard over area.
